Have you ever wondered why some epoxy floors last for decades while others flake and peel within months? The key difference often lies not in the product, but in how well the concrete floor was prepared for epoxy. Skipping crucial prep steps can turn your investment into a costly disaster. This expert guide will unravel the process, before you roll out any epoxy paint, so your floors look flawless—and stay that way.
Unlocking the Secrets: How to Prepare Concrete for Epoxy Applications
When it comes to how to prepare concrete for epoxy, understanding each step is critical to preventing premature epoxy coating failure. For business owners, property managers, and facility managers, the stakes are high: shortcuts can lead to chipped, peeling, or discolored floors, driving up repair costs and disrupting operations. Preparation is more than sweeping up dust—it’s about transforming your concrete floor into a ready canvas that will hold epoxy paint securely for years.
A successful application calls for thorough assessment, cleaning, moisture testing, correct profiling, meticulous patching, and the right choice of moisture seal epoxy primer. With the rise in high-traffic demands, modern epoxy coatings are formulated to bond deeply—but only when floors are properly prepped. Whether your site is a bustling warehouse, a garage, or a retail showroom, commit to comprehensive prep. Let’s explore why that foundation matters, and discover the proven steps that safeguard your floors and your investment.
Why Properly Preparing Concrete Floor Surfaces Matters for Epoxy Coatings
The allure of a pristine, high-gloss epoxy floor extends beyond aesthetics; it’s about durability, safety, and easy cleaning. But these benefits only materialize when the concrete floor beneath is sound, clean, and free from hidden threats like residual moisture or existing coatings. Inadequate preparation may lead to poor epoxy adhere, uneven finish, bubbling, or loss of adhesion. Humidity trapped inside untreated slabs can cause the epoxy coating to blister, forcing you into repairs that cost time and money.
For business and facility managers, understanding the science behind seal epoxy primer and the mechanics of surface profiling allows you to demand better from contractors—or deliver better results if you’re going DIY. Skipping or rushing any prep steps, especially moisture sealing, can undermine even the highest quality epoxy paint. Every successful coating project depends on patient, methodical floor readiness.
What You’ll Learn About How to Prepare Concrete for Epoxy
- The step-by-step process of how to prepare concrete for epoxy
- Common pitfalls and how to avoid costly mistakes with epoxy coating
- Expert tips on surface prep, moisture seal, and epoxy primer selection
- Criteria for evaluating readiness: when your concrete floor is ready for epoxy paint
- Answers to frequently asked questions about how to prepare concrete for epoxy
Understanding the Basics: What is Epoxy Coating and Where is it Used?
Epoxy coating is an advanced resin-based finish that delivers a dense, ultra-durable layer over concrete surfaces. Popular in commercial, industrial, and residential settings, epoxy is chosen for its resistance to chemicals, abrasion, impacts, and stains. Unlike standard floor paint—which offers only cosmetic upgrades—epoxy bonds chemically with the concrete, forming a rigid, impermeable surface that prolongs floor life.
For those responsible for facility maintenance, understanding the distinctions between epoxy paint and standard floor paint can clarify which is appropriate. Epoxy’s two-part formula (resin and hardener) ensures a cross-linked structure, outlasting one-part acrylic or latex paints. Its applications range from industrial warehouses and garages to retail stores and professional kitchens where performance under stress is a must. Knowing where—and how—to use epoxy guarantees both safety and curb appeal.
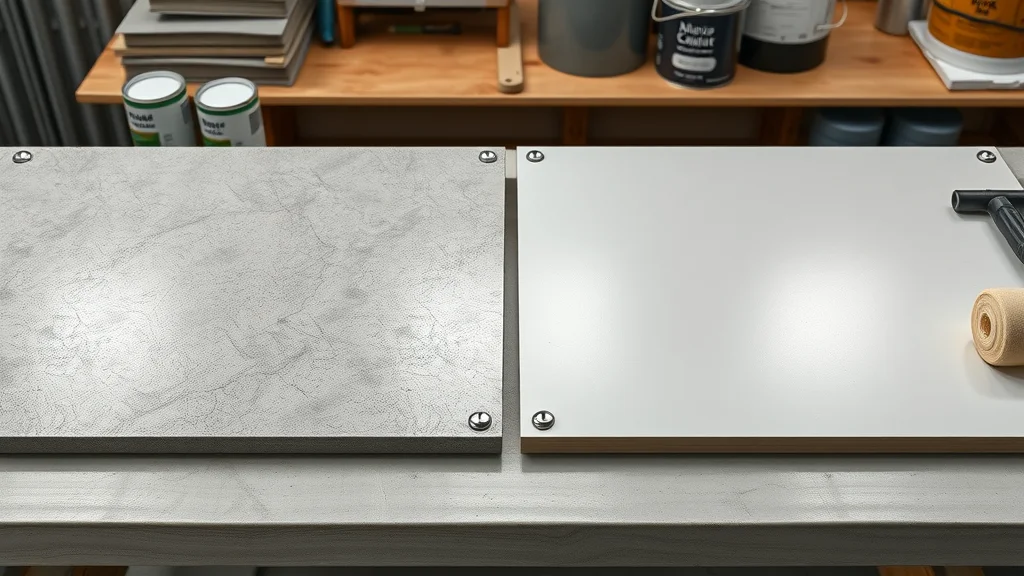
Epoxy Paint vs. Floor Paint: Key Differences and Benefits
Though often confused, epoxy paint and conventional floor paint serve different needs and perform at vastly different levels. Epoxy floor coatings are specifically engineered to bond tightly with properly prepared concrete, resisting peels, cracks, and chemical spills. Their high solids content delivers a thick, seamless layer, ideal for high-traffic or heavy-duty environments. In contrast, floor paint sits atop the surface, providing cosmetic coverage but little protection or longevity.
If you’re seeking a solution for sustained use—think warehouses, showrooms, or workshops—epoxy is the standard. For spaces that only require a quick touch-up, floor paint may suffice, but expect to repaint regularly. Clarifying these distinctions early helps facility managers select the right product for lasting value and fewer reapplications.
Ideal Areas for Epoxy Application on Concrete Floor Surfaces
Epoxy shines in any area where durability, hygiene, and visual appeal are priorities. Concrete floors in garages, manufacturing plants, distribution centers, automotive shops, and commercial kitchens often carry heavy loads, face chemical exposure, and endure constant foot or wheel traffic. Here, a tough, non-porous epoxy coating guards the substrate, minimizes cleaning frequency, and reflects ambient light for safer, more attractive environments.
Even retail, medical, or educational settings benefit from epoxy’s seamless finish, which can be customized for branding or safety marking. However, success depends on rigorous prep; floors in basements or older structures may require extra attention to moisture and prior coatings to ensure epoxy longevity and optimal performance.
| Feature | Epoxy Coating | Traditional Floor Paint |
|---|---|---|
| Durability | Highly resistant to wear, impacts, chemicals | Prone to chipping, staining, and wear |
| Adhesion | Bonds chemically with prepared concrete floor | Sits atop, may peel on high traffic areas |
| Longevity | 5–10 years or more (with proper prep) | 1–2 years, frequent recoating needed |
| Moisture Resistance | Excellent (with moisture seal) | Limited, can bubble or flake |
| Appearance | Glossy, seamless, customizable colors | Matte to semi-gloss, basic colors |
How to Prepare Concrete for Epoxy: Step-by-Step Guide
Mastering how to prepare concrete for epoxy means following a methodical series of steps. This comprehensive walk-through ensures you leave no room for error, protecting your investment from hidden moisture, powdery residue, and structural flaws that sabotage epoxy adhesion. Even decades of proven solutions can fail if the foundation isn’t right. Below is your ultimate checklist for flawless results.
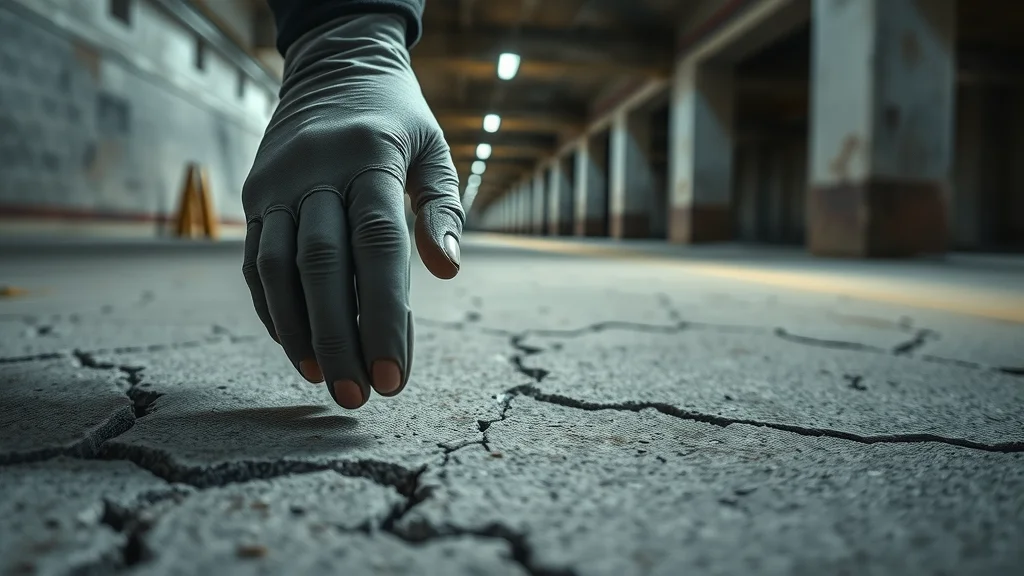
1. Inspecting the Concrete Floor: Assessing Surface Integrity and Existing Floor Paint
Before any cleaning or repairs, conduct a thorough walkover. Concrete floor inspections should focus on cracks, pitting, grease, stains, old coatings, or a soft layer of dust that can weaken epoxy bonds. If there’s any floor paint or prior epoxy, determine whether it’s intact or peeling. High-moisture areas need close attention, as trapped humidity is the top culprit in premature coating failures. Moisture can lurk below sealed surfaces, making professional-grade testing a wise step.
Look for visible surface cracks, discolorations, and old sealants. Use a wire brush to test the surface—if powder or flakes lift easily, further preparation and a moisture seal will be required. For large cracks or uneven areas, note the locations for targeted repair. Skipping inspection risks applying the coating over compromised spots, reducing the life and performance of your new epoxy floor.
- Check for cracks, stains, and previous coatings
- Identify signs of moisture problems that may require a moisture seal
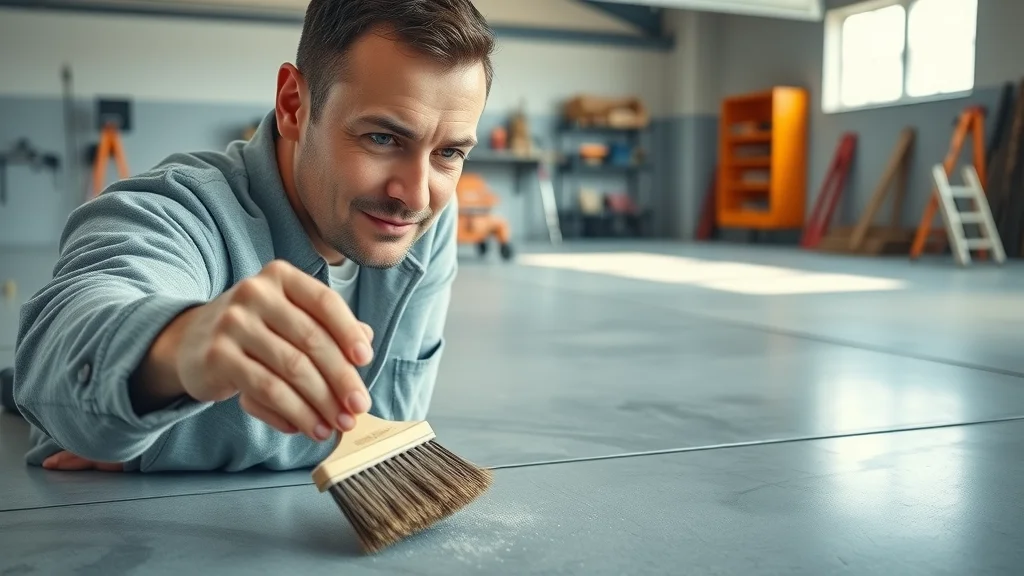
2. Cleaning and Degreasing: Ensuring Your Concrete Floor Is Pristine
Cleaning a concrete floor for epoxy prep is about more than removing dirt—it’s about erasing every trace of oil, grease, debris, or prior coatings that could block adhesion. Start with a sweep using a stiff-bristled broom, followed by vacuuming to remove fine dust. Stubborn stains? Deploy a concrete-specific degreaser and scrub with a wire brush to reach embedded contamination. For oil-soaked areas, repeated cleaning may be required until water can bead cleanly off the surface.
Once the major grime is tackled, mop the floor with a neutral-pH cleaner, then rinse thoroughly and allow the slab to become fully dry. Don’t rush this step! Even slight dampness can destroy the bond; an epoxy coating demands a completely dry concrete surface for optimal performance. If mold or mildew is present, treat with a biocide and rinse fully—this ensures your epoxy paint achieves a flawless, uniform finish on the first try.
- Remove dirt and debris
- Use concrete-specific cleaners and degreasers
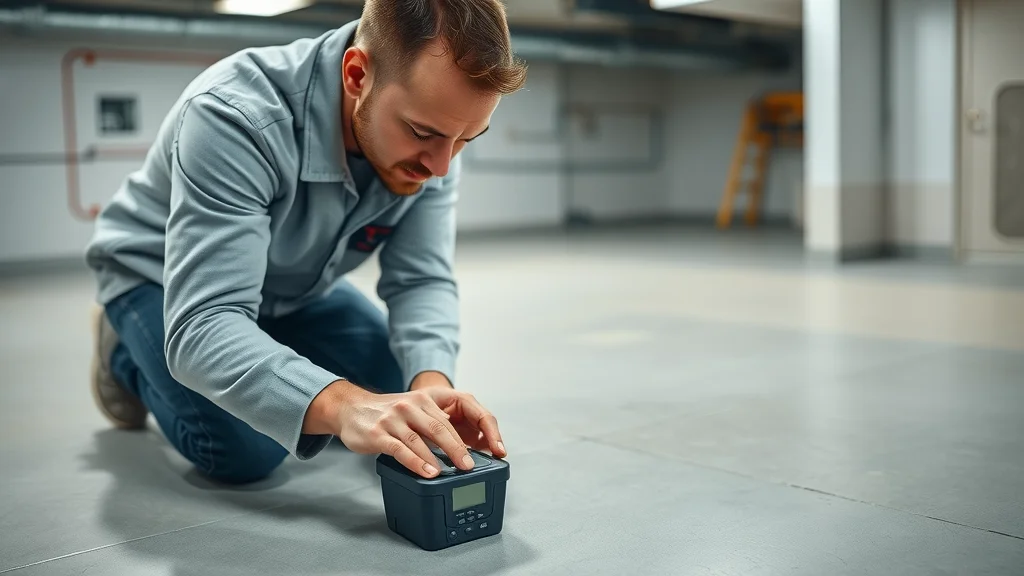
3. Testing for Moisture: Why Moisture Seal Matters in How to Prepare Concrete for Epoxy
Moisture beneath the concrete floor is the silent saboteur of epoxy projects. Always test for excess moisture before moving forward, especially in basements, new pours, or areas with visible discoloration. Employ an electronic moisture meter or the classic plastic sheet test: tape a sheet of plastic to the surface for 24–48 hours and check for condensation underneath.
If readings are high or condensation appears, your floor needs a moisture seal epoxy primer before applying epoxy. Skipping this step will guarantee issues like bubbles, soft spots, or outright peeling, even with top-tier products. Where high groundwater or chronic dampness is present, fully dry before applying any primer or top coat to ensure longevity of the system and avoid problem calls down the road.
4. Grinding or Etching: Do You Need to Grind Concrete Before Applying Epoxy?
Surface profiling is the unsung hero of epoxy installs. Mechanical grinding or acid etching ensures your concrete surface is open and rough enough to accept epoxy paint. While acid wash is an option, a floor grinder fitted with the proper grit disk is preferred on larger jobs, offering instant access to a precise profile without leaving harmful residue.
After grinding or etching, sweep and vacuum thoroughly to remove dust. If you chose acid etching, neutralize with a baking soda solution and rinse completely. Let the floor become completely dry before any priming—no exception! These methods eliminate the soft layer left by previous coatings or curing compounds, providing a robust tooth for the epoxy to grip for a uniform finish and trouble-free performance.
- Mechanical grinding versus acid etching
- Best practices for surface profiling
5. Repair and Patching: Addressing Cracks, Holes, and Damaged Areas
Every crack or gouge in the slab is a future failure point if ignored. Use an epoxy filler or a patching compound designed specifically for concrete floor repairs. Mix and fill each imperfection according to product instructions, letting each patch cure thoroughly. For large voids, feather edges to avoid bumps that will show through the final coat of epoxy.
Patching not only prevents “telegraphing” of flaws into the new surface, it locks out future moisture intrusion and ensures durability across the entire system. Repairing before priming and sealing safeguards against costly rework—and delivers a high-solids, high-performance floor that meets decades of proven solutions in green facility management.
- Selecting suitable epoxy filler or patching repair products
- How repair impacts successful application of epoxy coating
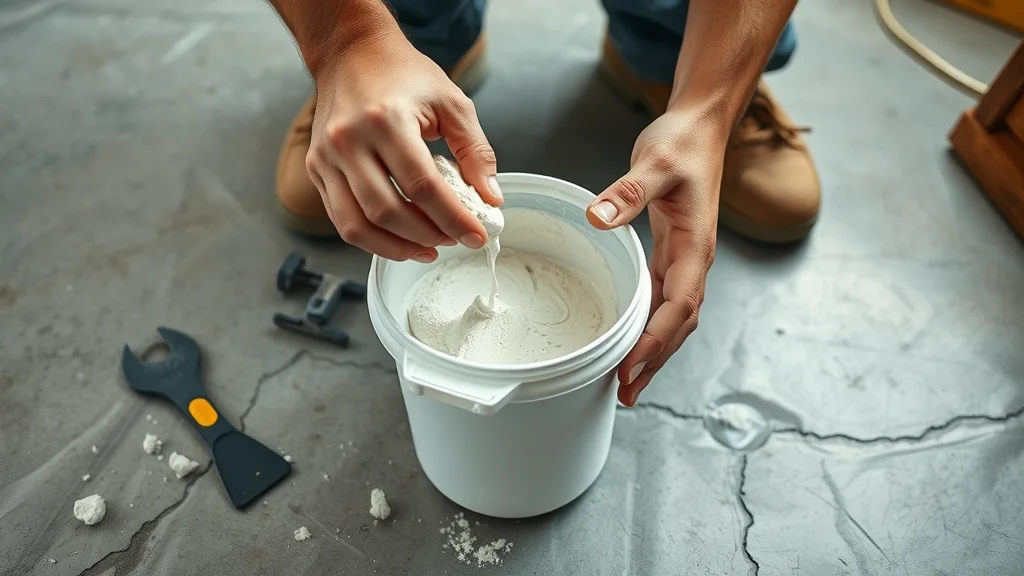
6. Priming: The Critical Role of Epoxy Primer and Moisture Seal Epoxy Primer
Priming is your insurance policy in the epoxy process. A top-quality epoxy primer (especially a moisture seal epoxy primer for high-humidity areas) penetrates into the concrete, sealing pores and creating an ideal bond with the later coats. Use a seal epoxy primer if your site is subject to vapor drive or has ever shown signs of dampness. Follow manufacturer guidelines to select the right formula for your application.
Apply the primer evenly and allow it to become fully dry before applying any subsequent coat. Skipping or skimping on this critical layer is a common, costly mistake that can undermine the longevity of your epoxy coating. Ensuring proper primer selection and application will lock in durability and maximize return on your flooring investment.
- When and why to use an epoxy primer on a concrete floor
- Moisture seal epoxy primer selection criteria
“Failing to properly prime is one of the most common and costly mistakes in epoxy application.” — Industry Expert
Applying Epoxy: Last Steps in How to Prepare Concrete for Epoxy
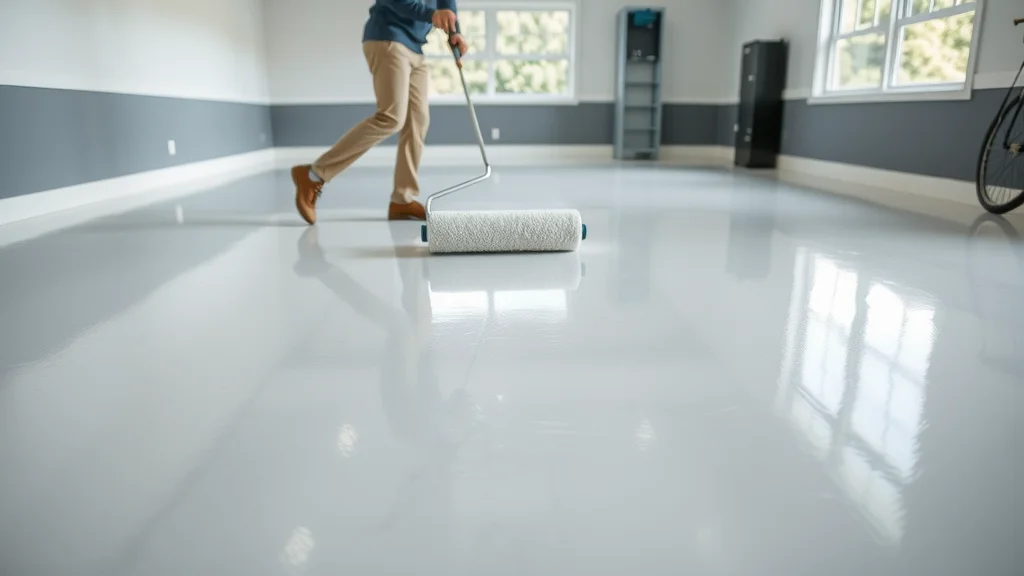
The journey culminates with mixing and applying the coating. Proper technique transforms all your preparation into a smooth, gleaming, epoxy floor that stands up to years of use. Always follow product directions regarding mix ratios (especially for high solids systems), pot life, and recoat windows. Only apply epoxy when both slab and air temperatures are within the recommended range—usually above 55°F (13°C) and humidity below 85%.
Pour mixed epoxy paint into shallow pans and use a professional-grade roller for uniform distribution. Avoid puddling and work swiftly, as the mixture will begin to cure quickly. For thick, durable coverage, multiple coats may be needed—let each layer become completely dry before applying the next. The result is an attractive, high-performing concrete floor that will impress clients and withstand abuse.
Pro Tips for Applying Epoxy Coating on Concrete Floors
Success with epoxy is a function of both art and science. Always blend resin and hardener thoroughly for optimal chemical reaction and even results. Only mix batches you can apply within the “pot life”—expired epoxy can lead to soft spots or weak adhesion.
Maintain ventilation and monitor environmental conditions during application: humidity or temperature swings can change cure rates or create a haze. When feasible, schedule projects during mild, dry weather for maximum control, especially for facilities sensitive to downtime. Each of these details ensures you achieve the robust, uniform finish that property managers and business owners expect from industrial-grade epoxy coatings.
- Mixing epoxy paint for optimal results
- Recommended environmental conditions for application
Avoiding Common Mistakes in How to Prepare Concrete for Epoxy
Even the most thorough plans can go awry if overlooked details sneak in. Steer clear of these classic errors:
- Skipping the moisture seal step risks blistering and pulls epoxy away from the surface as water vapor escapes.
- Improper use of epoxy primer or seal epoxy primer can leave floors weakly bonded and prone to early failure.
- Underestimating surface repair needs means cracks and holes telegraph through the new coat, undoing aesthetic and structural gains.
- Not allowing proper cure times between steps leads to soft or tacky spots and compromised long-term durability.
Being diligent at each phase yields a finished result that withstands both use and scrutiny.
People Also Ask About How to Prepare Concrete for Epoxy
How to get epoxy to stick to concrete?
Answer
To ensure epoxy adhere to concrete, start by thoroughly cleaning and degreasing the surface. Any oil, dust, or floor paint residues must be fully removed. Profile the slab using mechanical grinding or acid wash to achieve a porous, textured surface—epoxy bonds best when it can grip tiny surface irregularities. Always patch cracks or holes and apply an epoxy primer or seal epoxy primer suited to your environment, making sure the concrete floor is completely dry before applying epoxy. Follow all product instructions precisely for best results.
Can you epoxy over old concrete?
Answer
Yes, you can use epoxy paint over old concrete—but only if the surface is structurally sound and free from major contamination. Remove all previous coatings, stains, or soft layer residues, repair damage, and test for moisture. Proper floor grind or acid etching is required to open up the surface. If the slab has moisture issues, always use a moisture seal epoxy primer. Meticulous prep ensures performance and longevity, even on aging floors.
How to tell if concrete is ready for epoxy?
Answer
Check readiness by confirming the surface is perfectly clean, patched, profiled, and dry. Tape a piece of plastic to the floor for 24 hours—if no moisture appears underneath, you’re ready for epoxy coating. Run your hand across the surface; it should feel like fine-grit sandpaper. Absence of dust and complete removal of oil stains or soft patches indicate your floor is prepped for a successful application of a coat of epoxy.
Do you need to grind concrete before applying epoxy?
Answer
Grinding is highly recommended for most projects—it ensures the concrete floor is rough enough for a strong bond. While acid wash is an alternative, it may not be as effective, and residue can cause issues if not neutralized fully. A floor grinder or concrete grinder will open the pores and promote maximum adhesion, especially if you’re overcoming old floor paint or sealers. Always finish with a thorough cleaning so the surface is dust-free before priming and coating.
FAQs: How to Prepare Concrete for Epoxy
- Can moisture seal epoxy be used on all concrete floors?
Moisture seal epoxy is safe and often recommended for any concrete floor that is below grade, prone to moisture intrusion, or located in high-humidity environments. Always test first and use products matched to your slab’s unique needs. - How soon can you walk on newly applied epoxy coating?
Most epoxy coating systems require 24–72 hours to fully cure. Light foot traffic may be permitted after 24 hours, but heavy objects or machinery should wait until the coating has cured completely, as specified by the manufacturer. - Is professional assessment recommended before applying epoxy paint?
For high-investment projects or sites with a history of floor issues, a professional assessment can identify risks like hidden moisture or structural concerns, saving time, money, and frustration in the long run.
Key Takeaways: How to Prepare Concrete for Epoxy
- Thorough cleaning and inspection prevent epoxy failures
- Moisture and surface condition dictate preparation needs
- Choosing the right epoxy primer and method matters
- Adhering to each preparation step ensures the longevity of your concrete floor
Ready for Flawless Floors? Get Started with a Free Quote
Don’t leave results to chance. Get Started with a Free Quote—visit colepainting.com/contact/ or call (508) 799-9019.
Properly preparing your concrete floor is essential for a successful epoxy coating application. For a comprehensive understanding of the preparation process, consider consulting the article “Surface Preparation For Epoxy Installations,” which provides detailed guidelines on cleaning, profiling, and moisture testing to ensure optimal adhesion. Additionally, the guide “10 Steps to Prepare Garage Floor for Epoxy Coating” offers a step-by-step approach, including tips on etching and repairing concrete surfaces. These resources will equip you with the knowledge to avoid common pitfalls and achieve a durable, long-lasting epoxy floor.